Preauthorizing devices
The Mender Server supports preauthorizing devices, where you add the identity and public key of the device to the Mender Server before the device connects for the first time. This way the device is automatically authorized to join the Mender Server when it first connects. This is in particular useful in a mass production setting because you can preauthorize devices when they are manufactured so they automatically get accepted into the Mender Server when your customer turns them on, which might happen several months after manufacturing.
See Device authentication for a general overview of how device authentication works in Mender.
Prerequisites
A board integrated with Mender
You need a physical board that has already been integrated with Mender. For example, you may use one of the reference boards BeagleBone Black, Raspberry Pi 3 or Raspberry Pi 4.
If you have not yet prepared a device visit one of the following:
The identity of your device
When preauthorizing a device you need to know its identity. This is one or more key-value attributes, depending on the identity scheme you are using. If you connect your device so it shows up as pending in the Mender Server, you will see its identity in the Mender Server UI. Note that preauthorization is not based on the ID of the device, only on the key-value attributes under Identity.
By default the Mender client uses the MAC address of the first interface on the device as the device identity, for example mac=02:12:61:13:6c:42.
Mender client and server connectivity
Once your device boots with a newly provisioned disk image, it should already be correctly connecting to the Mender Server. After booting the device you should see it pending authorization in the Mender Server UI, similar to the following.
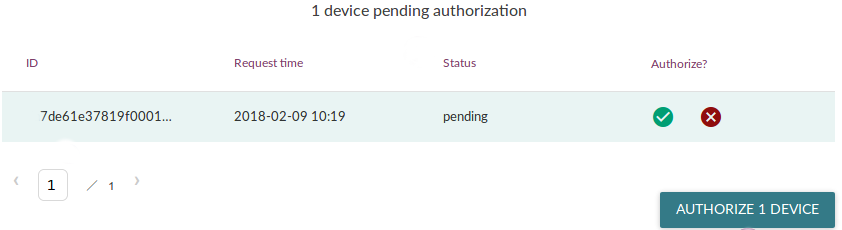
If your device does not show as pending authorization in the Mender Server once it boots with the disk image, you need to diagnose this issue before continuing. See the troubleshooting section on connecting devices in this case.
A CLI environment for your server
In order to access the Mender Server API with the commands below, you need to set up some shell variables in the terminal you will be using.
Follow the steps in set up shell variables for cURL.
Mender-Artifact tool
Download the mender-artifact tool from the Downloads section.
Generate a client keypair
Before we preauthorize the device, we need its 1) identity and 2) public key. You should already know the identity of your device from the prerequisite above.
We will generate the keys on a separate system (not on the device), and then provision them into the device storage. This way we can keep records of the public key of the device and ensure sufficient entropy during key generation, so the resulting keys are secure random.
Make sure the system you generate keys on is adequately secured, as it will also generate the device private keys. You should consider securely deleting (e.g. shred) the private keys after provisioning the device if you do not truly need a record of them (you can keep the public keys).
We will use a script to generate a keypair the Mender client understands; it uses the openssl command to generate the keys.
Download the keygen-client script into a directory:
wget https://raw.githubusercontent.com/mendersoftware/mender/4.0.2/support/keygen-clientEnsure it is executable:
chmod +x keygen-clientRun it without parameters:
./keygen-clientYou will find the generated Mender client keypair in a subdirectory keys-client-generated:
keys-client-generated/
├── private.key
└── public.key
In cases where you are generating multiple keys you can pass an environment variable PREFIX_KEY to the keygen-client script and run it several times. For example, PREFIX_KEY=device001- ./keygen-client, PREFIX_KEY=device002- ./keygen-client. This prevents overwriting existing keys by writing them to different files.
Preauthorize your device
Now that we have the device's identity and public key, we will use the Mender Server management REST APIs to preauthorize it. You can review the API documentation in this API chapter.
Make sure there are no existing authentication sets for your device
First make sure to power off your device, so it does not continuously appear as pending in your server.
We recommend that you ensure there are no records of your device in the server; open the Mender UI, then go to Devices to see if it is there, then Decommission it.
Please be advised that the Mender Server backend, consisting of microservices, is asynchronous by design.
If you run multiple pre-authorization requests together with many decommission operations,
it is possible that you may run into 409 Conflict responses. It can mean that the decommission
device workflow has not finished when a new pre-authorization request for the same auth set arrived.
If, for some reason, you run into problems of that sort and there are data inconsistencies between the
different microservices but deviceauth has the current and up-to-date information on your devices,
you can use deviceauth command line to propagate the correct status, and device attributes.
See the deviceauth --help for details.
Secondly, To make sure that the device has no existing authentication sets, we check devauth service for the identity of your device.
In the same terminal, run the following command:
curl -H "Authorization: Bearer $JWT" $MENDER_SERVER_URI/api/management/v2/devauth/devices | jq '.' > /tmp/devauth.jsonTo make the response more readable, we use the jq utility to decode it. If it is not available on your system you can omit this pipe or replace it with a different indentation tool (e.g python -m json.tool).
Now open the file /tmp/devauth.json and search for a value of your device identity (e.g. 02:12:61:13:6c:42 if you are using MAC addresses).
If you do not get any matches in either files, great! Continue to the next section.
If you do have one or more matches you must first delete these existing authentication sets. Find the id of the device, as well as the id of the authentication set, and use the DELETE method towards the service. For example, if you find the identity in devauth.json and you see the device has id 5ae3a39d3cd4d40001482a95 and the authentication set has id 17a1838b-1b48-470a-925e-0d2bf25bb09f, then run the following command:
curl -H "Authorization: Bearer $JWT" -X DELETE $MENDER_SERVER_URI/api/management/v2/devauth/devices/5ae3a39d3cd4d40001482a95/auth/17a1838b-1b48-470a-925e-0d2bf25bb09fIf there is only one authentication set for the preauthorized device, the above will also delete the device.
Now, re-run the command above to generate the devauth.json file again and verify that your device identity does not exist anywhere.
Call the preauthorize API
Set your device identity as a JSON object in a shell variable:
DEVICE_IDENTITY_JSON_OBJECT_STRING='{"mac":"02:12:61:13:6c:42"}'Adjust the variable value to the actual identity of your device. If you have several identity attributes in your identity scheme, separate them with commas in JSON format inside this single object, for example DEVICE_IDENTITY_JSON_OBJECT_STRING='{"mac":"02:12:61:13:6c:42", "serialnumber":"1928819"}'.
Secondly, set the contents of the device public key you generated above in a second variable:
DEVICE_PUBLIC_KEY="$(cat keys-client-generated/public.key | awk 1 ORS='\\n')"Then simply call the API to preauthorize a device:
curl -H "Authorization: Bearer $JWT" -H "Content-Type: application/json" -X POST -d "{ \"identity_data\" : $DEVICE_IDENTITY_JSON_OBJECT_STRING, \"pubkey\" : \"$DEVICE_PUBLIC_KEY\" }" $MENDER_SERVER_URI/api/management/v2/devauth/devicesIf there is no output from the command, this indicates it succeeded. To verify, list the currently registered authentication sets and make sure there is one for your device with the preauthorized status:
curl -H "Authorization: Bearer $JWT" $MENDER_SERVER_URI/api/management/v2/devauth/devices | jq '.'Your device should now be preauthorized and accepted to the Mender Server once it connects with the exact same identity and key.
Copy generated device key to disk image
Now that we have generated a key for the device and preauthorized it, we need to copy the generated private device key to our working disk image (it typically has the .sdimg suffix). We copy it to its default location /mender/mender-agent.pem on the data partition.
There is a symlink from /var/lib/mender/mender-agent.pem on the root filesystems to /mender/mender-agent.pem on the data partition, which we will leave in place. If the Mender client does not find a valid key it will generate one, which is not what we want when we are preauthorizing devices.
Copy the private device key
Find the location of the private key we generated and copy it into place on the data partition by running the following commands:
mender-artifact install -m 600 keys-client-generated/private.key mender-disk-image.sdimg:/data/mender/mender-agent.pemBoot the device
Now provision the storage with this new disk image, just like you have done in the past. If you are using a SD card, insert it into your workstation and use a command similar to the following:
sudo dd if=<PATH-TO-IMAGE>.sdimg of=<DEVICE> bs=1M && sudo syncThen insert the SD card back into your device and boot it.
Verify the device is accepted
If everything went as intended, your device will get the accepted status in the Mender Server. You can log in to the Mender UI to ensure your device is listed and reports inventory.
If you do not see your device at all, verify it booted correctly and it is able to connect to the Mender Server. You can check the Mender client logs on the device for more diagnostics information.