Deploy a firmware update
Now that Mender is running on your device, let's deploy new firmware. We will make a simple change to the Zephyr application by modifying the "Hello World" message, build a new firmware image, and use Mender to deliver this update OTA to the ESP32-S3 board.
We will increment the "version" of our firmware by changing the Artifact name, create a Mender Artifact for the new firmware, upload it to the server, and create a deployment for our device. The device will download the update, install it, and reboot into the new firmware. MCUboot will swap the new image into place, the device will run the new firmware and mark the update as successful.
Step 1 – Modify the firmware
Let's introduce a simple change to the firmware to recognize the new version. The example mender-mcu-integration project prints a "Hello World" message upon startup, which we will change.
Open the source code of the application. Open ~/mender-mcu-workspace/mender-mcu-integration/src/main.c in a text editor. Change the line
printf("Hello World! %s\n", CONFIG_BOARD_TARGET);to
printf("Hello updated World! %s\n", CONFIG_BOARD_TARGET);Ensure you save your changes to the source code.
Step 2 – Rebuild the firmware
Now, compile the modified firmware. We will use the same build directory for simplicity. In the terminal with the Zephyr virtual environment, set the new version and rerun the west build:
export ARTIFACT_NAME="release-2"
cd ~/mender-mcu-workspace
west build --sysbuild --domain mender-mcu-integration -- -DCONFIG_MENDER_ARTIFACT_NAME=\"$ARTIFACT_NAME\"
Note: We don’t need to pass any other parameters to the west build command since they were cached from the last build. We use the --domain parameter to rebuild only the application (not the bootloader).
The build system will recompile any changed source files and produce a new zephyr.signed.bin and generate the Mender Artifact together with the binary. Since we changed the code and the artifact name setting, both the binary and the Artifact will represent "version 2" of our firmware.
Do not flash the device manually. We will let Mender deliver this update. The new binary image is in the build directory (e.g., build/mender-mcu-integration/zephyr/zephyr.signed.bin).
Step 3 – Upload and deploy the update from Mender
With our Artifact ready, we'll now use the Mender server to deploy it to the device. We'll do this using the hosted Mender web interface:
- Upload the Artifact: In the hosted Mender UI, go to the Releases tab. Click the Upload button. In the dialog, either drag and drop the
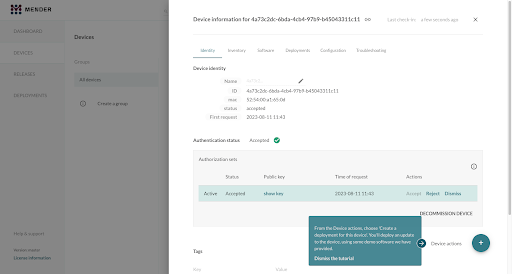
zephyr.menderfile or click to browse and select it. You can give the release a name when prompted, but sticking with the default is fine. After uploading, you should see a new release entry (e.g. "release-2") in the Releases list. - Create a deployment: Now navigate to the Devices section and find your device (it should be in the Accepted Devices list). In the Device information view for the device you just connected, select Create a deployment for this device from the Device actions.
- This will start the deployment wizard. Since we create a deployment for the specific device, the Select a device group to target should be filled in. Choose the release you uploaded: "release-v2". Review the configuration and start the deployment.
- Monitor the deployment: You should see the new deployment listed with the status "Pending" or "In progress." After a short time, it should change as the device downloads and installs the update:
- The device will download the Artifact. You might see its LED flicker as it writes flash, or you can watch the serial console, which will show logs of download progress.
- Once downloaded, the client will instruct MCUboot to prepare for an update and reboot the device.
- The deployment status on the server might show as "Rebooting" then "In progress."
- The device reboots into MCUboot, which swaps in the new image and boots it as a test image.
- The Mender client on the device starts up in the new firmware and reports to the server that it's running the new artifact "release-v2". Assuming no issues, it then marks the update as successful.
- The server's deployment status should eventually become Finished (successful). If using hosted Mender, you'll see the deployment move to the "Finished" tab with a status of "Success."
- Verify the new firmware on the device: You can now check that the device is indeed running the updated firmware:
- In the hosted Mender UI, under the Devices tab, look at the device's inventory or details. Once the device reports inventory after the update, the current Software (artifact name) should update to "release-v2".
- If you have the serial monitor running, you would have seen the new log message
"Hello updated World!"appear after the reboot, confirming the code change.
Done!
Congratulations – you have successfully deployed a new firmware to your microcontroller via Mender! 🎉 After the deployment finishes, your device will run the new application code you provided. The update was applied in a robust manner: if the new firmware had failed to start, MCUboot would have rolled back to the previous version automatically on reboot. The new firmware is now permanent because everything went well and the client confirmed the update.
You can repeat the process to iterate on your firmware. For example, try changing the message again or toggling an LED, then create a new artifact (e.g. "release-v3") and deploy it. Each time, ensure the Artifact name and device type are set correctly.
Summary and next steps
In this get started guide, we prepared a Zephyr-based microcontroller for OTA updates with Mender and successfully performed an update. We covered:
- Integrating the Mender MCU client and MCUboot into a Zephyr project.
- Connecting an MCU device to hosted Mender and authorizing it.
- Creating and deploying a firmware update using Mender Artifacts of type zephyr-image.
For now, you can continue exploring by:
- Trying different boards (ensure they have MCUboot support; you may use the same project and build for a different board if supported).
- Diving into the code: examine how the Mender client is initialized in the Zephyr app (the integration example provides insight into the API usage).
- Providing feedback via Mender Hub if you encounter issues or have suggestions.
With microcontroller support, Mender extends robust OTA updates to a new class of devices, enabling unified update management across both Linux and constrained edge devices. Happy updating!